
The Honeywell RTH6580WF is a smart, Wi-Fi-enabled thermostat designed for easy installation and energy efficiency. Its intuitive interface and remote access capabilities make it a popular choice for modern homes.
1.1 Overview of the Honeywell RTH6580WF Model
The Honeywell RTH6580WF is a Wi-Fi-enabled, smart thermostat offering advanced temperature control and energy efficiency. It features a color touchscreen, programmable scheduling, and smart home integration. Designed for compatibility with various HVAC systems, it provides remote access via the Honeywell Home app. The thermostat also includes geofencing, smart response, and adaptive learning capabilities to optimize comfort and energy savings.
1.2 Key Features of the RTH6580WF
The Honeywell RTH6580WF offers a 7-day programmable schedule, energy-saving modes, and smart home integration with Amazon Alexa and Google Assistant. It features a high-resolution color touchscreen and remote access through the Honeywell Home app. Geofencing technology adjusts temperatures based on your location, while smart response learns your home’s heating and cooling patterns to optimize performance. Energy reports and alerts enhance efficiency and system monitoring.
System Requirements and Compatibility
The Honeywell RTH6580WF is compatible with most HVAC systems, including gas, electric, and heat pumps. It requires a C-wire or adapter for power and supports Wi-Fi connectivity for smart features.
2.1 Compatibility with HVAC Systems
The Honeywell RTH6580WF is designed to work with various HVAC systems, including gas, electric, and heat pump configurations. It is compatible with single-stage and multi-stage systems, as well as dual-fuel setups. Ensure your system supports 24V AC and has the necessary wiring, including a C-wire or common wire, for proper functionality. This thermostat is not compatible with millivolt or high-voltage systems. Always verify compatibility before installation.
2.2 Necessary Tools and Materials for Installation
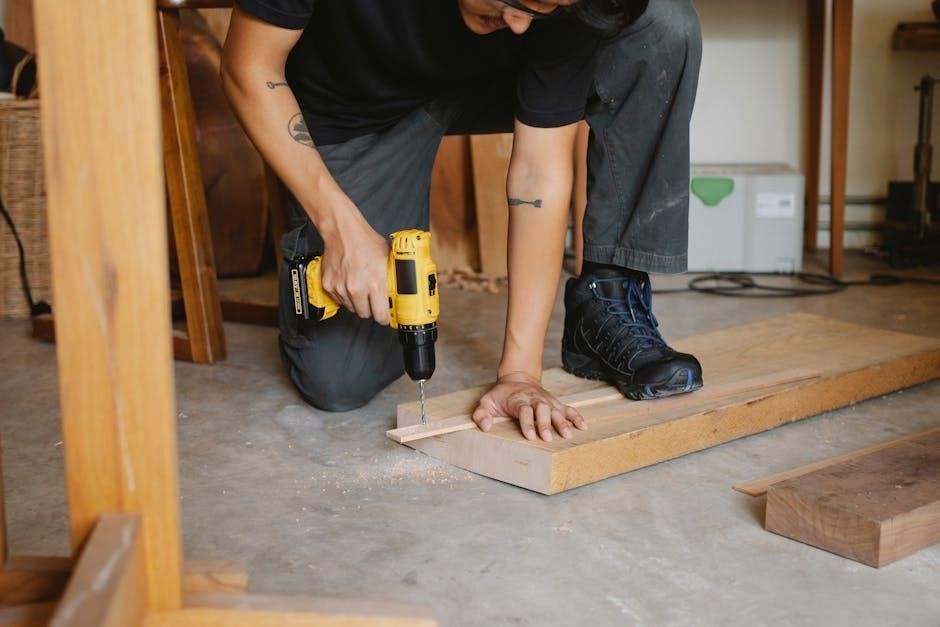
For a smooth installation, you’ll need a flathead screwdriver, Phillips screwdriver, wire strippers, and a drill with bits. Pliers and a voltage tester are also recommended for safety. Ensure you have the thermostat unit, mounting hardware, screws, and wall anchors provided in the box. A label maker can help organize wires. Refer to the manual for specific requirements to ensure a successful setup.

Pre-Installation Steps
Before starting, ensure the HVAC system is turned off at the circuit breaker. Verify system compatibility and gather all necessary tools and materials.
3.1 Turning Off Power to the HVAC System
Locate the circuit breaker or switch controlling your HVAC system and turn it off. Verify the thermostat is unpowered by checking its display. Ensure all system components, including fans and compressors, stop functioning. This step prevents electrical shocks or damage during installation. Always confirm the power is off before proceeding. Additionally, check for any residual power in the system to ensure safety.
3.2 Removing the Old Thermostat
Gently pull the old thermostat away from the wall to detach it from the mounting bracket. Be careful not to damage the wires connected to it. Once removed, handle the wires carefully to avoid bending or damaging them. You may take a photo of the wire connections for reference. Remove any remaining adhesive or hardware from the wall to prepare for the new installation.
3.3 Labeling Wires for Easy Installation
Before disconnecting the wires from the old thermostat, take a clear photo of the wiring configuration for reference. Use color-coded labels or write the terminal identifiers (e.g., R, W, Y, G, C) on each wire with a marker. This ensures accurate connection to the new Honeywell RTH6580WF thermostat; Avoid stretching or damaging the wires during labeling to maintain their integrity and functionality.
Installation Process
The installation involves mounting the thermostat, connecting wires to their respective terminals, and securing the device to the wall. Follow the step-by-step guide carefully.
4.1 Mounting the New Thermostat
Begin by attaching the new Honeywell RTH6580WF thermostat to the wall plate. Ensure the thermostat is level and aligned properly. Remove the old thermostat and identify the wall plate. If compatible, screw the wall plate into the wall and snap the thermostat into place. Secure it firmly to ensure proper functionality and display accuracy.
4;2 Connecting Wires to the Thermostat
Connect the wires to the Honeywell RTH6580WF thermostat by matching the labeled terminals from the old system. Ensure the power is off before proceeding. Remove the old thermostat, label the wires, and attach them to the corresponding terminals on the new thermostat. Secure the wires firmly to prevent loose connections. Double-check all wire connections for accuracy to ensure proper system operation.
4.3 Securing the Thermostat to the Wall
Use the provided screws and wall anchors to mount the Honeywell RTH6580WF thermostat. Ensure the wall is level and the thermostat is aligned properly. Gently press the thermostat onto the wall plate, making sure it clicks securely into place. Verify that all connections are tight and the thermostat is evenly seated. Finally, turn the power back on and test the display to confirm proper installation.

Configuration and Setup
After installation, power on the thermostat and follow on-screen prompts. Select your system type, choose Wi-Fi network, and set temperature preferences. Registration may be required for remote access.
5.1 Initial Power-On and Device Recognition
Once powered on, the Honeywell RTH6580WF thermostat will display a start-up screen. The device will perform a self-test to ensure all components are functioning properly. It will then automatically detect and identify the type of HVAC system connected, such as forced air, heat pump, or radiant heating. This recognition process ensures proper configuration for optimal performance. Verify that all systems are recognized correctly before proceeding.
5.2 Setting Up Wi-Fi Connectivity
To set up Wi-Fi connectivity for the Honeywell RTH6580WF, navigate to the network menu on the thermostat. Select your home Wi-Fi network from the available options. Enter the password using the touchscreen keypad. The thermostat will connect to the network. Once connected, a confirmation message will appear. Ensure your router is nearby to maintain a strong connection for remote access functionality through the Honeywell Home app.
5.3 Configuring Temperature Settings
Access the temperature settings menu on the Honeywell RTH6580WF by selecting the “Menu” option. Choose between heat, cool, or auto mode. Set your desired temperature range, ensuring it’s within the recommended limits to avoid extreme temperatures. Use the arrows to adjust settings. Save your preferences to maintain consistent comfort levels. For advanced control, schedule temperature changes or use the hold feature to override the current setting temporarily.
TIP: Set a moderate temperature to optimize energy efficiency and comfort.

Programming and Scheduling
Set custom temperature schedules for weekdays and weekends. Choose specific times for heating and cooling adjustments. Enable energy-saving modes to optimize comfort and efficiency.
TIP: Plan schedules around your daily routine for maximum energy savings.
6.1 Creating a Weekly Schedule
Set up a 7-day schedule with specific temperature adjustments for different times of the day. Program wake, leave, return, and sleep periods for optimal comfort. Customize settings for weekdays and weekends. Use the Honeywell Home app to create and modify schedules easily. Ensure the schedule aligns with your daily routine for maximum energy efficiency and convenience.
TIP: Plan your schedule around your lifestyle to save energy and maintain comfort.
6.2 Setting Temperature Hold Parameters
The Honeywell RTH6580WF allows you to set temporary temperature overrides without altering your scheduled programming. Enable the “Hold” feature to maintain a specific temperature until the next scheduled event or for a custom duration; This feature is ideal for unexpected changes in your routine. Access the hold settings via the thermostat or the Honeywell Home app for flexibility.
TIP: Use the hold feature during special events or when you’ll be away longer than expected.
6.3 Energy Savings Features
The Honeywell RTH6580WF offers advanced energy-saving features to reduce utility bills. Its smart scheduling and geofencing capabilities optimize heating and cooling based on your location. The energy usage report provides insights to help you identify inefficiencies. The thermostat also supports energy-saving modes during peak hours.
TIP: Enable smart response to learn your system’s behavior and minimize energy waste.

Advanced Features
The Honeywell RTH6580WF boasts advanced features like geofencing, smart home integration, and adaptive learning. These capabilities enhance convenience and energy efficiency. Use the Honeywell Home app for remote control and smart responses to optimize your settings effectively.
7.1 Geofencing and Smart Home Integration
The Honeywell RTH6580WF supports geofencing, which uses your smartphone’s location to adjust temperatures when you leave or arrive home. It integrates with smart home systems like Amazon Alexa and Google Home, allowing voice control and seamless smart home automation. This enhances convenience and energy efficiency, providing a modern solution for temperature management.
7;2 Remote Access via Honeywell Home App
The Honeywell Home App enables remote access to your RTH6580WF thermostat via iOS and Android devices. Users can adjust temperature settings, monitor current temperatures, and receive system status updates. The app also provides notifications for temperature deviations, ensuring consistent comfort. Remote access allows for convenient control, optimizing energy usage and system performance from anywhere with an internet connection.
7.3 Smart Response and Adaptive Learning
The Honeywell RTH6580WF features Smart Response, which learns the HVAC system’s behavior to optimize heating and cooling cycles. Adaptive Learning adjusts temperature settings based on user interactions and schedule patterns. These features enhance comfort by anticipating needs and reducing energy waste, ensuring efficient operation tailored to the home environment and user preferences over time.
Troubleshooting Common Issues
Identify and resolve issues like display malfunctions or connectivity problems by checking power sources, wire connections, and software updates. Consult the manual for detailed solutions.
8.1 Display Issues and Blank Screen
A blank screen or display issues on the Honeywell RTH6580WF may indicate power supply problems or loose wire connections. Ensure the thermostat is properly powered and wires are securely connected. Restarting the device or checking for firmware updates can resolve display malfunctions. If issues persist, consult the manual or contact support for further assistance.
8.2 Connectivity Problems
Connectivity issues with the Honeywell RTH6580WF may arise from incorrect Wi-Fi setup or an unstable network connection. Ensure the thermostat is connected to the correct network and the password is entered accurately. Restarting the router or checking for physical obstructions can resolve signal strength problems. If issues persist, verify network stability or perform a factory reset as outlined in the manual.
8.3 System Malfunction or Inconsistent Heating/Cooling
If the system malfunctions or heating/cooling operates inconsistently, check for loose connections or incorrect wiring. Verify temperature settings and schedules are properly configured. Ensure the thermostat is calibrated correctly and sensors are clean. If issues persist, reset the thermostat or consult a professional. Physical obstructions or faulty sensors may also cause irregular performance, requiring thorough inspection or replacement of damaged components.
Maintenance and Upkeep
Regularly clean the thermostat and ensure proper calibration. Replace batteries if applicable and update firmware for optimal performance. Schedule periodic checks to maintain efficiency and functionality.
9.1 Cleaning the Thermostat
Regular cleaning ensures optimal performance. Use a soft, dry cloth to wipe the thermostat’s display and exterior. For stubborn marks, lightly dampen the cloth with water, but avoid harsh chemicals. Never spray liquids directly on the device. Gently clean the sensors and vents to prevent dust buildup. This maintenance helps maintain accuracy and extends the product’s lifespan. Perform cleaning every 3-6 months for best results.
9.2 Updating Firmware
To ensure optimal performance, periodically update the thermostat’s firmware; Use the Honeywell Home app to check for updates. Connect the device to Wi-Fi and follow in-app prompts to download and install the latest version. The thermostat will automatically restart during the process. Keep the device powered and connected to avoid interruptions; Updated firmware enhances features, improves security, and resolves bugs for smoother operation. Manual updates are rarely needed, as the system typically checks for updates automatically.
9.3 Replacing Batteries (If Applicable)
The Honeywell RTH6580WF may require battery replacement if it’s not hardwired. Use 2 AA alkaline batteries. Open the battery compartment on the back by sliding it downward. Remove the old batteries and insert the new ones, ensuring correct polarity. Close the compartment securely. Dispose of old batteries properly. Low battery alerts on the display indicate when replacement is needed for uninterrupted operation. Always use fresh batteries to maintain functionality. Replace every 12-18 months or as indicated. Ensure the thermostat remains powered during replacement to avoid losing settings or requiring a reset. Refer to the user manual for specific instructions if the device does not immediately recognize the new batteries. Battery replacement is a quick and straightforward process that ensures optimal performance and prevents unexpected shutdowns. Properly align the compartment to avoid damage. Avoid mixing old and new batteries. If the thermostat is hardwired, batteries are not required. Check your system configuration to confirm if batteries are needed. If unsure, consult the installation guide or contact Honeywell support for clarification. Always turn off power to the system before performing any maintenance to ensure safety and prevent potential damage to the device. Use high-quality batteries to ensure reliable performance. After replacing, test the thermostat to ensure all functions work correctly. If issues persist, consider resetting the device or checking for firmware updates. Regular battery checks are essential for maintaining consistent temperature control and smart features. Schedule battery replacements as part of routine maintenance to avoid service interruptions. Keep spare batteries on hand to minimize downtime. If the thermostat is used in a high-traffic or critical area, consider setting reminders for battery replacements to ensure continuous operation. Always handle batteries safely and follow proper disposal guidelines to protect the environment. If the thermostat is part of a smart home system, monitor battery levels through the app for proactive maintenance. Replace batteries during a time when temperature control is not critical to avoid discomfort. If the thermostat is in a hard-to-reach location, plan accordingly to minimize inconvenience. Use a ladder or step stool safely to access the device. If unsure about any step, consult a professional to avoid accidents or system damage. Battery replacement is a simple task that ensures your Honeywell RTH6580WF continues to provide reliable temperature control and smart home integration. Regular maintenance extends the lifespan of the device and prevents unexpected issues. Stay proactive with battery replacements to enjoy uninterrupted service from your thermostat.
Safety Precautions
Always turn off power to the HVAC system before installation. Handle electrical components with care to avoid damage or shock. Ensure proper disposal of the old thermostat.
10.1 Handling Electrical Components Safely
When handling electrical components, ensure the HVAC system is powered off. Use a voltage tester to confirm no electricity is present. Avoid touching wires with wet hands or while standing on damp surfaces. Always use insulated tools to prevent shocks. Never force connections, as this could damage the thermostat or wiring. If unsure, consult a licensed electrician to ensure safe installation.
10.2 Avoiding Overheating Risks
To prevent overheating, ensure the thermostat is installed in a well-ventilated area, away from direct sunlight or heat sources. Avoid placing it near radiators, heaters, or fireplaces. Properly insulate walls to reduce heat transfer. Check wiring connections for looseness, as poor connections can generate heat. Regularly clean dust from the thermostat to maintain proper function and avoid temperature inaccuracies.
10.3 Proper Disposal of Old Thermostat
Dispose of your old thermostat responsibly; Check local regulations for electronic waste disposal. Many thermostats contain mercury or other hazardous materials. Do not dispose of them in regular trash. Use designated e-waste recycling centers. Remove batteries before disposal and recycle them separately. Ensure all sensitive components are handled safely to protect the environment. Proper disposal helps reduce environmental impact and adheres to local regulations.
Warranty and Support
Honeywell offers a comprehensive warranty and dedicated customer support for the RTH6580WF. Contact support for assistance, and refer to the manual for warranty details and resources.
11.1 Understanding the Honeywell Warranty
The Honeywell RTH6580WF thermostat comes with a limited warranty covering defects in materials and workmanship. The warranty typically lasts for two years from the date of purchase. It includes repair or replacement of faulty parts at no additional cost. However, it does not cover damage caused by misuse, improper installation, or normal wear and tear. For full details, refer to the Honeywell RTH6580WF installation manual or visit the Honeywell Home website.
11.2 Contacting Customer Support
To contact Honeywell customer support, visit their official website or refer to the Honeywell RTH6580WF installation manual. Support options include phone, email, and live chat. For urgent inquiries, call the toll-free number provided in the manual. Online support resources, such as FAQs and troubleshooting guides, are also available to assist with common issues.
11.3 Online Resources and FAQs
Honeywell provides extensive online resources and FAQs to support the RTH6580WF. Visit their official website for downloadable manuals, troubleshooting guides, and installation tips. The Honeywell RTH6580WF installation manual PDF is available for detailed instructions. FAQs cover common issues, ensuring easy resolution without contacting support. Additional resources include video tutorials and user forums for comprehensive assistance.
The Honeywell RTH6580WF installation process is complete. Follow the manual for optimal performance and energy efficiency. Regular checks ensure functionality, while the PDF guide remains a handy reference.
12.1 Final Checks After Installation
After installing the Honeywell RTH6580WF, restore power and test basic functions. Ensure the thermostat displays correct temperatures and responds to adjustments. Verify schedule settings and remote access via the app. Check for proper system operation in heating, cooling, and fan modes. Review all connections and settings to confirm everything is configured correctly. This ensures optimal performance and energy efficiency from the start.
12.2 Tips for Optimal Performance
For optimal performance, update the thermostat firmware regularly and ensure proper Wi-Fi connectivity. Clean the device periodically to avoid dust buildup. Use the Honeywell Home app to monitor and adjust settings remotely. Maintain consistent schedules and leverage energy-saving features like geofencing. Regularly check battery levels if applicable, and ensure all wire connections are secure. These steps ensure reliable operation and energy efficiency.
12.3 Benefits of Proper Installation
Proper installation ensures optimal heating and cooling efficiency, reducing energy consumption and lowering utility bills. It prevents system damage and extends the thermostat’s lifespan. Correct setup also guarantees safety, reliable performance, and warranty validity. A well-installed thermostat enhances smart features functionality, providing precise temperature control and seamless smart home integration. This results in a comfortable, energy-efficient, and environmentally friendly home environment.